
Beat world bosses by reacting to their tells and clearing summons; Seed awaits in World 6, Episode 4. The normal Ratatan bosses run from The Jolly Hermit through Wagoon, Lord Rosham Bo, Chillwarden, and Flipflop, with stronger world bosses and Dark Ratatan in later challenges. Clear Episode 2 to unlock Episode 3, then clear Episode 3 to unlock Episode 4.
Which Ratatan bosses do you face in the normal worlds?
The normal world-boss order is The Jolly Hermit, Wagoon, Lord Rosham Bo, Chillwarden, then Flipflop. This Ratatan boss list separates those encounters from hard variants, Dark Ratatan, and the World 6 finale.
| World | Boss | Your main response |
|---|---|---|
| 1 | The Jolly Hermit | Jump slams and cannon fire; pull back from bubbles. |
| 2 | Wagoon | Guard burrowing attacks and clear summoned enemies. |
| 3: Jam Jammer Jungle Journey | Lord Rosham Bo | Read the totem's color before choosing your response. |
| 4: Frozen Flower Fantasia | Chillwarden | Move through projectile gaps and clear an escape route. |
| 5: Bonedead Theatre | Flipflop | Clear large summons before overlapping spells restrict movement. |
The Jolly Hermit
Jump when the raised claw comes down, or guard if you need the simpler response. Jump's brief invulnerability also lets you avoid the single-cannon and triple-cannon volleys.
When the bubble windup starts, use Fall In to pull your whole squad backward. Retreating is a useful habit for the stronger Hermit encounter too. The normal Hermit's water cannon fires after 2 turns of preparation; jump to avoid it.
Wagoon
Guard when Wagoon dives into the sand. The burrow can lead to different attacks, so guessing a jump risks catching the rock fragments instead.
Kill summoned enemies before returning to the boss. Leaving them alive means dodging Wagoon while rocks arrive from elsewhere. For the red-roar attack, guard during the roar, then jump on the next turn to handle the charge after the debris.
Chillwarden
Follow with your squad when Chillwarden changes sides, and shift the camera with you. For the ice bursts, move slightly below and to either side of a burst's center, using the gaps between neighboring bursts. Guard and skip a command round if you need to focus on movement.
Guard the slow bone fish and steer through their gaps. A blind jump can drop you straight onto a fish that has not passed yet. When enemies appear, gather your Cobun on one side and push through them together instead of splitting your damage.
For the ultimate, break the ice pillars blocking your route, then retreat to the far end opposite Chillwarden. Some Cobun can still stick out and take damage, so keep the squad as far back as you can.
Flipflop
Read the aura, then deal with the immediate threat:
| Aura | Attack | What you should do |
|---|---|---|
| Green | Fast bouncing projectiles | Move toward an edge and find a gap; starting guard only after the green flash can be too late. |
| Pink | Tracking explosive circles | Guard to reduce the explosion damage after 1 turn. |
| Purple | Summoned enemies | Kill large enemies first; freezing or stunning Flipflop can interrupt that summon. |
| Blue | Tornadoes | Retreat right; the far-right edge is outside their spawn locations. |
| Orange | Placed explosive circles | Avoid stepping into the circles while keeping your escape route open. |
Ignoring the purple summons makes the later spells much harder to handle. Large enemies can block your route while tornadoes and circles force you to move. Spending Super Fever to clear them can be a better trade than squeezing in more boss damage.
How do you beat Ratatan boss 3, the jungle boss?
Lord Rosham Bo is the World 3 jungle boss: jump the hand-slam shockwave, then counter each totem attack by its color. When the limbs retract, prepare for the totem sequence; the following turn's color tells you what is coming.
- Blue flash: jump over the ground-level water laser.
- Yellow flash: leave your Cobun attacking on the ground and move your Ratatan onto a platform to draw the 3 tracking electric orbs away from them. If your Cobun are already above ground, gather them down when the totem windup begins.
- Red flash: pull the entire squad backward from the fireballs. At low boss health, the fire attack can become blue bouncing fireballs; guard instead of relying on the same retreat.
Those colors describe the incoming attacks, so choose a movement response rather than treating them as card-element matchups. For the basic commands behind these counters, see Ratatan how to play.
A player who fought Lord Rosham Bo while pushed back found that it stopped advancing before the entrance. Losing ground does not mean you must abandon the run: keep guiding the electric orbs away from your Cobun and respond to the next tell.
How do you beat Dekadon in Ratatan?
Dekadon is the dragon boss of the tutorial: jump over his Fire Breath and Charge, step out of meteor fire pools, and look for the gaps when purple flames signal Meteor Shower. He is a boss, not a playable Ratatan. Once the guardian deity of a world made by another god, he is out of place among the Ratatans.
You can fight him in two places. He closes out the tutorial, and if you enable Powerful Invitation at the Goddess Games statue in Rataport, he replaces Lord Rosham Bo as the World Boss of Jam Jammer Jungle. The tutorial fight was made easier on September 18, 2025, when his behavior was simplified for beginners.
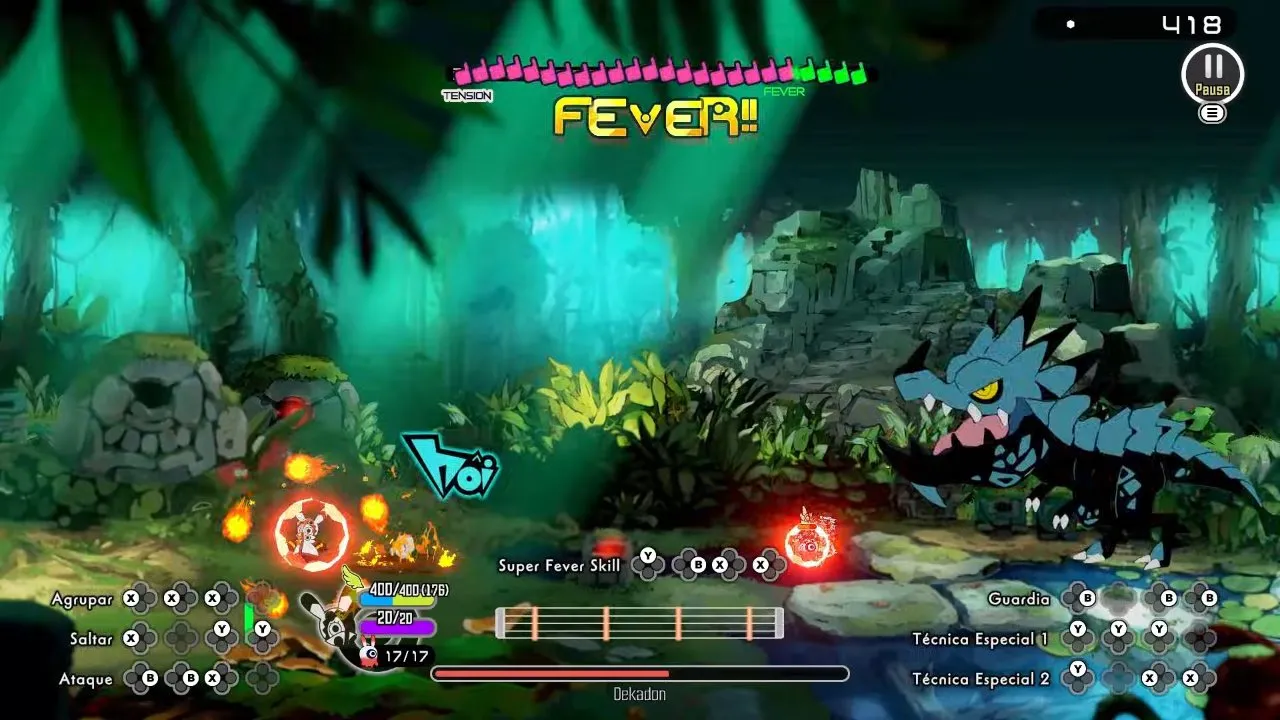
| Attack | Tell | What to do |
|---|---|---|
| Slam / Triple Slam | Head slams the ground in front, once or three times | Stay out of the space in front of his head |
| Meteor / Triple Meteor | Red eye and a roar; at low HP, three meteors land side by side | Move off the target spot and stay out of the fire pool it leaves |
| Fire Breath | Low crouch, then a stream of fire that can burn Cobun | Jump over it |
| Charge | Low crouch while pawing the ground, then a long rush | Jump over it; it can still hit allies jumping farther away |
| Leap / Shockwave | Jumps around the arena; the shockwave keeps hitting and knocks back | Give him room; contact hurts even mid-jump |
| Meteor Shower | Purple flames around him and a distinct sound | Find the narrow safe gaps between meteors |
Fire Breath and Charge both start with the same low crouch, so watch for the pawing that marks Charge. His hard form in the Goddess Games plays differently; see the hard bosses table below. In the old demo, Dekadon was an optional, very hard fight you got once per save: winning dropped a Rough Scale, and losing sent you back to Rataport.
How do you beat the hard Ratatan bosses?
Hard encounters change the response you need, especially Dekadon's similar-looking crouches. The Goddess Games, available after clearing World 5, let you summon stronger world-boss forms.
| World | Hard boss | What changes your response |
|---|---|---|
| 1 | The Scurvy Hermit | Jump cannons and slams. Retreat from poison bubbles, then move inward toward the boss to escape the poison cannon pattern. |
| 2 | Windigoon | Guard when it burrows. For the ultimate, a player's preferred route is rightward movement followed by a double jump; a projectile barrier can help. |
| 3 | Dekadon | Keep your Ratatan apart from the Cobun so tracking meteors target you away from the squad. Jump the charge, then immediately guard against the return. |
| 4 | Charged Dekadon | Guard early when it walks backward, then jump at the ground scrape. Lightning can still connect, so keep the damage reduction. |
| 5 | Flipflop (Hard) | The opening phase uses normal patterns; the next phase adds bombs, sweeping lasers, claw slashes, and a tracking face. |
For Dekadon, jump the breath attack but guard the meteor ultimate. Both begin with a crouch; fire above the crouching boss marks the meteor attack. Guarding the breath can leave you burned, while jumping the meteor ultimate can put you into the falling impacts. The normal fight's full move list is in the Dekadon section above.
Charged Dekadon's backward hop signals the electric-orb sequence. Gather onto a platform before jumping, and prepare earlier when its health is low because the orbs arrive faster.
Against Flipflop's later phase, guard the bomb windup and use a low jump for the bombs. Give up a command round to move through a long laser sweep if necessary. For the claw sequence, a lower-floor opening calls for staying low; an upper-floor opening calls for the upper platform's left side. When the tracking face flashes, use a low jump, or double-jump promptly when it appears.
How do you create openings against Dark Ratatan?
Interrupt summons and trigger each Dark Ratatan's stagger condition to get a safer damage window. All 8 Dark Ratatan can be fought by progressing their events; Shellshock, Tangletung, The Bamboozler, and Panda Monium join the later-episode encounters.
A player's practical rhythm is to use area attacks during the summon command, then guard when the enemy gathers its troops. Freezing or knocking the boss down with electric effects during the summon can cancel it, leaving the following gather-and-attack sequence without troops to command.
| Dark Ratatan | How you create the opening |
|---|---|
| Midnight Knight | Clear all white bats summoned by the ultimate within 2 turns. |
| Funky Fang | Bait its charge into its spiked totem or Harigittan's turret. |
| Reek N. Roll | Clear the Dark Cobun; after the ultimate, wait through the run and a slam for the opening. |
| Bork The Biter | Defeat all the dog Cobun it summons. |
| Shellshock | Wait out the giant shell-charge ultimate, then attack during the recovery. |
| Tangletung | Detonate an explosive plant when Tangletung is nearby. |
| The Bamboozler | Let at least one bamboo shoot grow into a clone, then defeat every clone. |
| Panda Monium | Keep attacking during the giant rolling attack; enough damage knocks it down. |
Greedy attacks into advancing Dark Cobun can get you pushed around during your command input. Guard during their setup, then commit damage when their attacks finish or you trigger the stagger.
Who is the Ratatan final boss, and where do you fight it?
Seed is the final boss in World 6 during Episode 4, and the battle has 3 phases. World 6 becomes accessible from Episode 3 onward when its progression conditions are met. If you are still finishing Episode 2, follow Ratatan how to unlock Episode 3 before chasing the finale.
Phase 1: Golden construct
The opening phase pits you against a golden construct in the ruined arena. Its boss health bar runs along the bottom of the screen.
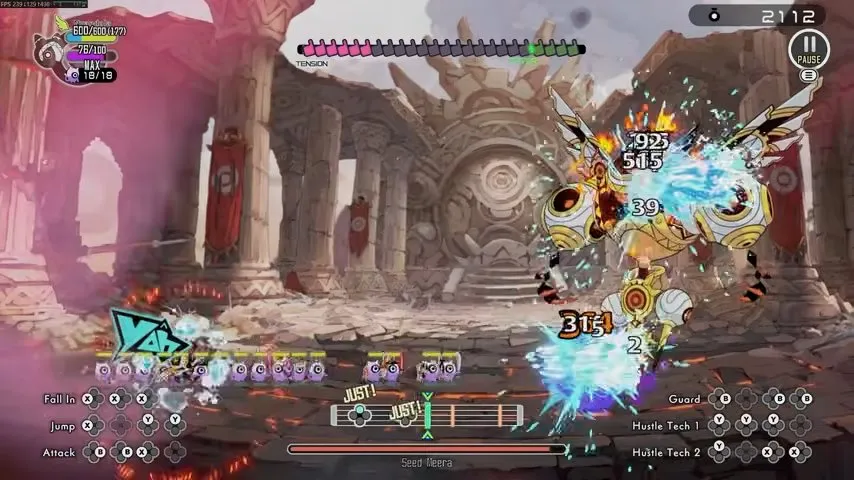
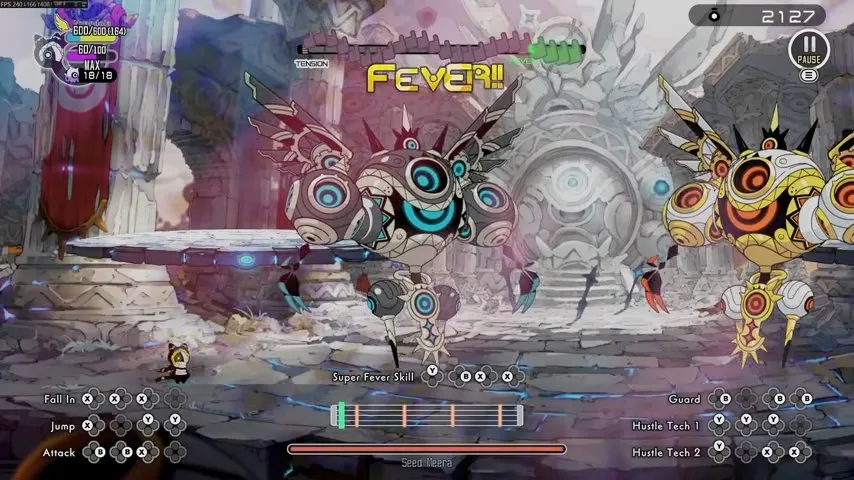
Phase 2: Blue and golden constructs
The next phase puts blue and golden constructs in the arena together. You will see both bodies facing your Ratatan, with the arena platform to the left.
Phase 3: Seed's humanoid form
The final phase is Seed's humanoid form with large dark wings. The bottom health bar now reads Seed, so the construct phases are not the end of the fight.
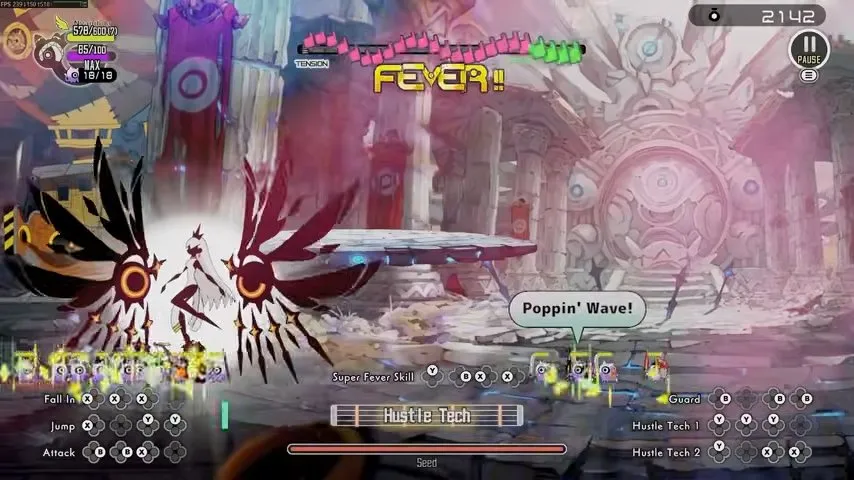
Defeating Seed leads to the ending. After clearing it, you can keep your save data and replay any episode; continue to Ratatan ending for the story's conclusion.